Tips and tricks

5 Reasons Why Custom Polo Shirts Are A Great Way To Promote Your Brand

5 Reasons Why Custom Polo Shirts Are A Great Way To Promote Your Brand

Here’s why we think embroidered polo shirts are a great way to promote your business…

They’re smart.
Polo shirts are instantly smarter and more professional looking when compared to a crew neck t-shirt. The collar detail, ribbed cuffs and button down detail makes an instant impression and they don’t cost much more than the crew neck t-shirt we supply.

Comfort and wearability.
Polo shirts are indeed smarter, but you don’t have to compromise on comfort. We stock a fantastic range of polo shirts that are ideal for any requirement. For an image conscious brand; we have a selection of slim fit polos to choose from. Where fabric performance is important – we have ClimaCool® polo shirts, and also heavy weight styles for warmth or durability. We also stock long sleeve styles, ladies polos, specialty sports polos and kids polo shirts. And because no one likes ironing, we also stock EasyCare® polos!

Fantastic uniform garments.
Embroidered polo shirts are one of the top garment choices for uniforms. A branded polo is all you need to make a good impression. This is why so many businesses choose it as uniform wear, instead of expensive head to toe bespoke garments.

They’re hard wearing.
As polo shirts are more heavyweight in general (when compared to t-shirts) they are instantly more hard wearing. The fabric is built and manufactured in a completely different way, which means they can withstand constant wear and tear.

Satisfaction guaranteed.
We pride ourselves in creating the best customisation outcome possible. Before any of the garment embroidery goes ahead, we send you an embroidered swatch image of your logo via email in order for you to see the thread colours and composition. Only then do we go ahead with embroidering your chosen polo shirts.

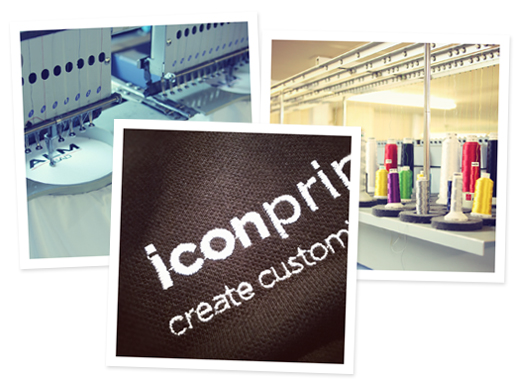
Here at Icon Printing we specialise in digital polo shirt embroidery. We have an experienced team who can customise as few as ten or as many as 1000+ polo shirts. We are able to cater to whatever requirements you may have, such as brand colour matching, over sized embroidery and logo artworking/digitizing. Embroidered polo shirts give an instant professional touch and make a fantastic option for work and team wear.

All our polo shirt embroidery takes place in London, for any further information please don’t hesitate to get in touch.

Email – sales@iconprinting.com

Tel – 0207 183 8431

From /unit

Loading custom options…

ICON Printing Ltd, 1 Mentmore Terrace, London E8 3PN - Registered in England, Company No: 07369266

Inspiration, Tips and tricks

Creative Printed Clothing Inspiration

Creative Printed Clothing Inspiration

Alongside promotional and corporate clothing, we also print garments for established and up ‘n’ coming clothing labels. Much of this artwork is fashion lead graphics or hand drawn illustrations. Bold, one or two colour designs print really well and can make very desirable items of clothing.

At Icon Printing, we are really passionate about what we do and we’re always on the look out for inspirational printed clothing to post up on our blog. So, check out these bad boys. Syndicate Original is a clothing label from Ukraine, who are inspired by “American heritage and also by the simplicity and minimalism of Scandinavian aesthetics.” Their focus is combining the aesthetics of classic menswear and enhancing cuts and concepts with up-to-date elements. They often collaborate with well-known artists, illustrators and designers which allows them to treat street style in such a unique and fresh way.

If you’ve got a favourite clothing line you think we should shout about, get in touch! We’d love to hear from you. Check out this link for t-shirt printing london information.

email: sales@iconprinting.com

phone: 0207 183 8431

Related Post

Support, Tips and tricks

5 Tips on Designing Artwork for Screen Printing

5 Tips on Designing Artwork for Screen Printing

Here are a few important pointers on what not to do when creating your artwork. By following these guidelines it will maximise the quality of your screen printed garment.

1. Web Images

Using images from the web can be handy, but note that most of the time these images are very small and set to only 72 dpi (very low image quality). Web designers use the lowest resolution and size possible so that their pages load fast while keeping the images looking good. Due to this, the image downloaded is designed to look good at the relatively small size it appears on screen and not printed out here in the real world. When it comes to screen printing, these forms of photo images should be avoided altogether – but vector based images are absolutely fine.

As shown above, many internet images are very pixelated and blurred.

2. Details

Try to avoid very small negative spaces as they can fill in or “bleed”. Ink is a fluid and therefore spreads a little bit by nature. So a very small negative space (such as the words “Screen Printing” – shown in the image below) can be filled in by the ink that surrounds it pretty easily. However, there is no hard and fast rule for avoiding bleed on small type/detailing, so every piece of artwork will be evaluated on a case by case basis. However, a good general guideline is to use fonts at or above 12 points and lines or outlines stroke size larger than 0.3 pt.

The fine or “light” version of this typeface is not a good choice, the hairline box detail also wouldn’t print.

3. Illustrator Effects

Illustrator has some cool effect options, but you’ve got to be careful when using them – especially when creating artwork for screen printing. Try to avoid drop shadow or gradient effects. These often look good (at first glance) and add dimension, but they complicate your file by mixing image types and this type of effect doesn’t translate to the screen successfully. If you do want a slight shaded area effect or gradient within your design or logo, it will need to be made up of a series of very small dots (when viewed close-up) that from a distance, create the look of a gradient or difference in tone. It is more time consuming, but the outcome is a much better print.

4. Transparencies

In Illustrator, when two shapes overlap and the one on top has opacity set lower than 100%, the color of the shape below it will affect its color. For example (see below), when the circle on the bottom is red and the one on top is blue with 50% opacity, the overlapping portion is violet. But when it comes down to printing, it almost never works out like that due to unpredictable ink transparencies and intermingling pigments. If you’ve got a red + blue = violet type scenario, use a spot color violet instead of transparencies.

5. Problem Colours

Inks have varying degrees of transparency. A few color ranges are very transparent and do not look good when printed on a particular colour under base – whether that’s another ink layer or your actual garment colour. This can leave areas looking splotchy, washed out and generally poor. Darker blues tend to be one of these and, unless you’re printing on to white garments, avoid using them. Another one to look out for, is bright fluorescent inks, they too are very transparent and tend to lighten up and lose brightness when printed on an under base.

If you have any questions about your artwork, we are here to help! Drop us an email or just give us a ring –

sales@iconprinting.com or on 0207 183 8431


Related Post

Support, Tips and tricks

How to: Save Artwork as a Transparent PNG

How to: Save Artwork as a Transparent PNG

This is a quick tutorial on how to save your artwork ready for DTG (direct to garment) printing.

Here are a few pointers to remember:

When creating a .PNG file to be DTG printed, make sure your artworks colour mode is set to RGB – otherwise it will not save as a .PNG file.

The best file type to create a print from is either an Illustrator .ai or .eps file (a vector file) or a high resolution .jpg file – that is at least 300 dpi and saved at 100% of the intended print size.
For more information on DTG printing in general, take a look here.
So, this is how you save a 300 dpi image in Photoshop as a transparent PNG for DTG printing.

To make things a little easier, we’ve made you a lovely PNG template – click here to download and follow the instructions.

Now create your artwork. If you’re using a logo you’ve made, a photo you’ve taken or even an illustration you’ve created, make sure it’s not sitting on a white background (unless you want it to), as this will print. For example…

Once you’ve created your artwork, it’s time to save it. You can maintain the transparency on the file, as we’re able to print full alpha, but remember any transparent areas will show the colour of whatever shirt you chose to print onto.

Having used our downloadable template, your file will already come up as a .png so just rename it and hit save. Don’t worry about the layers warning that may come up, your file will still save fine. A small PNG options window will then pop up, just tick the NONE option and you’re done.

Any questions on direct to garment printing? Give us a ring!

0207 183 8431

Related Post